There are many kits available for purchase online. These kits come with all the equipment you need and sometimes include enough ingredients for one batch of beer. If your kit does not come with any ingredients, I highly recommend Brooklyn Homebrew in Gowanus. Everyone there is equally knowledgeable and friendly and are eager to help you navigate the daunting world that is grains, hops and yeast. Here are our ingredients:
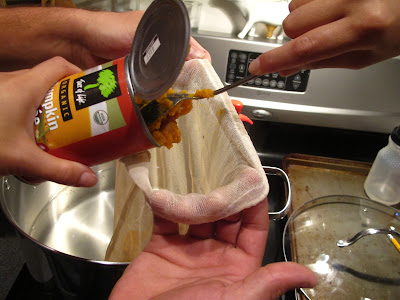
We are essentially brewing a large tea. After all, beer is mostly water. Bring six quarts of water to boil so that it reaches 152°F (your pot should be roughly three - five gallon capacity; the larger the better). A thermometor is your friend and germs are your mortal enemy during this whole process. Even though you are attempting to brew beer in your apartment, you should try as hard as you can to get the temperatures exact and keep everything sanitized. Once the pot of water has reached 152°F, steep the grains (we used two pounds of Simpsons Golden Naked Oats) and the pumpkin puree (two 15 oz. cans) for one hour.
Once the hour is nearly over start to boil 1.5 gallons of water so that it reaches 170°F. When the hour is complete, remove your grain and pumpkin puree bags from the large pot. Pour this newly boiled water over the grain and pumpkin puree bags to release any final flavors into your large pot. The mixture you have going now is called the "wort."
Top off the wort with water, almost filling the large pot. Leave enough room for the wort to be able to "vigorously boil" without boiling over. Once it is boiling again add the malt extract until disolved. We used 3.3 pounds of extra light liquid malt extract and two pounds of extra light dry malt extract.
Time for the hops! Add one ounce of bittering hops and boil the wort vigorously for at least 55 minutes.
During the final ten minutes of boil add the Whirlfloc tablet or similar clarifying aid which helps precipitate the flavor of the beer, but does not add any flavor.
During the final four minutes of boil add one ounce of aroma hops.
During the final one minute of boil add the spices: 2 oz. chopped crystalized ginger, two crushed cinnamon sticks, two split and seeded vanilla beans, and two crushed nutmeg seeds.
At this point it is extremely important to keep anything that touches the wort from now on sanitized. We are no longer boiling, so any unwanted bacteria that comes in contact with the wort will not be killed and may funkify the batch.
Rapidly cool the wort to 70°F. You do not want the wort to be too hot when you add the yeast because you could kill the little guys. We usually have extra bags of ice handy so we do not totally deplete the apartment's supply.
"Pitch" or add the yeast to the cooled wort and aerate thoroughly. We do not have an aeration pump so we do it the old fashioned way which is on the floor, vigorously stirring/shaking/rocking the carboy for about five to ten minutes. We made it to six..it is hard work!


